Family Session Prep Guide


WELCOME TO YOUR FAMILY SESSION GUIDE!
So you booked your session. Now what?
Via email we will discuss location selection, wardrobe selection, and answer any questions you have.
I am excited to capture you and your loved ones! Lifestyle photography is unique because it not only captures what you look like at a certain point in time, it captures who you are. I aim to capture raw and honest photos of your family and children. The goal is not to get a stiff and posed shot with everyone looking at the camera, but to capture the true essence of your family. I take a documentary approach to photography and use my understanding of my equipment and natural light to create images that will become works of art that you can hang in your home and pass down for generations. Here are a few tips to help you prepare for your session with me.
PREPARING FOR THE SESSION:
Location: Together, we will decide on the best location for your photos. Do you want to go on an adventure or have a quiet snuggle session at home (with adequate natural light)? Do you want to splash around at the beach or run around in the fields? When you know the vibe and style you want, that makes it easier to narrow down your location choices. I have many locations that I love to shoot at regularly but I am always open to new locations as well. You should choose a location that fits your style and personality. I can help you along with this decision.
If you are booking an in-home session, here are a few tips:
1. Pay attention to the light in your home right after booking, that way we can find the best time of day to shoot.
2. Have your house cleaned. This may seem a little daunting, but it will be less chaotic if your whole house is at least tidied, and that also means that there won’t be piles of laundry in the background.. unless you want that! You could even fold your laundry as part of the shoot! Real life right?
3. Make sure your kids know well ahead of time that this is happening. Even letting them lead me through their house and showing me their favourite spots helps them feel in control and like they aren’t being forced into pictures
Time: If we are shooting outdoors we will shoot either in the morning or in the evening. The light is typically too harsh mid day. If your children are up for it, shooting one to two hours before sunset provides gorgeous light and atmosphere. The images in my portfolio look the way they do largely because of my use of light and the time of day your session takes place has a huge impact. Many families tell me that they simply have the kids take a late nap or have some down time prior to their evening session.
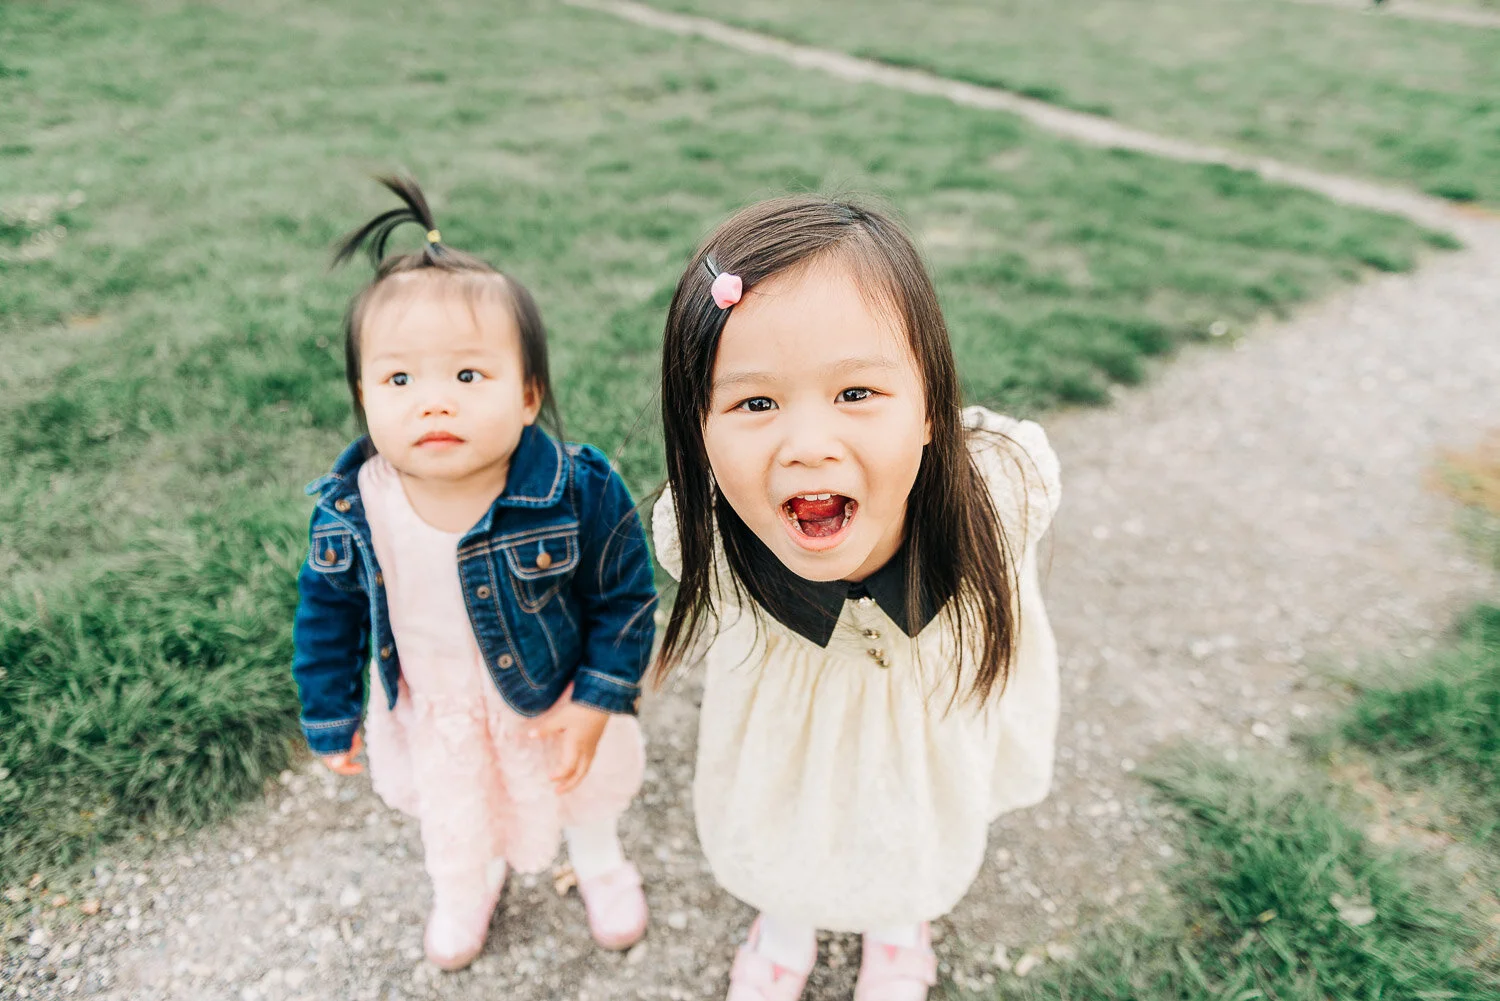
Your children: Remember that children are not usually fond of being told to pose or smile. It is best if we just give the children time to relax and try to capture their natural self. Don’t worry if your child is running about and active, most of the images you see of young children on my site were captured while the child or toddler was busy playing and exploring. To get the family shots, I usually direct the adults to simply “be” with the child, or hold the child and we go from there.
To get the most out of your session, make sure that your little one has rested and has had adequate snacks and water. We can take breaks for snacks and play, however I will probably still shoot during the breaks. Bring dry, non messy snacks so their little faces stay clean during the session.
Prepare the child for the session by letting them know that a friend will be taking some photos of them, it’s best not to surprise them.
Your Furbaby(ies):
Brush up on basic commands – in the weeks and days leading up to your session, take time to practice commands with your dog, like sit, stay, and down. These commands can be incredibly helpful when positioning your dog for photos.
Praise, Praise Praise – I once read that dogs would prefer praise and a belly rub over a treat. Whether or not this is true, the message applies. When your dog “poses” for a picture (even if just for a few seconds), be prepared to turn on the praise. Happy praise, belly rubs, whatever it takes to let your dog know that you are proud of their behaviour. Positive reinforcement works wonderful for encouraging your dog through the session
Bring plenty of treats and toys – Dogs will probably want some treats. Be sure to bring along a bag of your dog’s favourite treats to entice them to obey commands. Also a good idea to bring along favourite toy, but you may not want to bring it out first thing during the session. The sight of their favourite ball or squeaky toy may cause your dog to lose all the focus.
Are their needs met? – Make sure that your dog has had the opportunity to go to the bathroom, that they aren’t starving, and t hat they aren’t exhausted from a recent playdate or park trip.
Keep the leash on – Either the entire time or until the last possible minute. Having a leash on. Your pup not only ensures their safety but helps get them into position. Once they are in position, you can either quick undo the leash. Not wanting to take the leash off? Either tuck/hide it underneath or behind your pup or incorporate it into the picture.
Prepare yourself – and try to relax: You probably already know how sensitive they are to your moods. The calmer and more positive you are about your session, the more at ease your dog will feel.
Dress with your dog in mind – In the next section I will give you tips on what to wear. When you’re planning outfits for your session, think about your dog as well. Avoid colours that will clash with the colour of their fur. If your dog is a shedder, avoid wearing a colour that will really show their hair. For example, if you have a golden dog, you may not want to wear anything black.
Your pet is a part of your family, so they deserve to be in your family photos! jUst be patient with your dog and remember that their unpredictability is part of why you love them so much. The most important thing is capturing your family in all the joy and love you share!
What to Wear: Wardrobe should be comfortable and reflect who you are. I do not recommend matching but rather coordinating. You might be REALLY tempted to go out and buy a whole new outfit (believe me, I’m all for an excuse to buy new clothes!) but you might consider wearing some of your favourite pieces that you already have! Feeling comfortable in your clothes is going to make such a huge difference to how you act in front of the camera. Especially for kids, make sure they wear the outfits you want them to wear in the photos, wearing new clothes can sometimes be uncomfortable!
We’ve established that you must feel fabulous in whatever you’re wearing, but if the outfit doesn’t come immediately to mind, here are some tips that might help you out!
1. Think about the location. It might be hard to maneuver through a waterfall in heels! Make sure you’re dressed in a way to make it easier to move. If your signature look is a pair of heels, remember to bring a pair of sneakers or slip ons in case we are going on an adventure to get to our location!
2. This isn’t the time to try out new style. Wear something that you would normally wear. If dresses are not your thing and you hardly wear one, don’t feel pressured to wear one if you want the photos to look sophisticated! There are other ways to achieve that look without going outside of your comfort zone! You want to look like yourself in these pictures. Remember, feeling comfortable and confident is key!
3. Solid colour outfits tend to look better than prints, which can be distracting and overwhelming. If you do go with a print, make sure it’s not too loud!
4. Start with a neutral base and build from there. Neutral tones are typically more flattering and cohesive than bright colours. Pick two or three neutrals to start with and then add little accents of colour if you want!
5. Consider the weather! Make sure you’re prepared with cute coats if its rainy or snowy!
If you’re still stuck, head to pinterest for inspiration and you can send me pictures of your outfit(s) if you want my opinion!
Props: I do not use props during my sessions, however, if you have something in mind please let me know.
THE DAY BEFORE:
Get plenty of rest the night before your session. Go to bed at a reasonable time so you wake up refreshed and ready! If you are exhausted, you will look exhausted!
Drink lots of water. Good hydration will make skin glow and look FABULOUS!
Avoid drinking alcohol the night before. Alcohol dehydrates us and lends itself to red skin, tiny wrinkles and those puffy black circles that form under your eyes.
Make up:
If you are going to wear foundation make sure it matches your skin – all of it! You want to make sure your face and neck are the same colour
Keep makeup simple and elegant and take it easy on the bronzer
If you are interested in having your hair and makeup done professionally, I have a preferred makeup artist & hairstylist that I can recommend.
What to bring:
Child essentials (diaper bag)
Snacks
Stroller (if we have a longer walk)
Change of clothing for kids (if necessary)
Drinks (sippy cup or bottle of water)
Wipes for messes
Brush
Hair clips (bobby pins)
Towel (if your session is at the beach)
AFTER THE SESSION:
I will get to work on culling your images down to the very best of the best (typically between 40-60 images/session), then editing those images and getting them up into your gallery. Once they're ready, I'll be in touch and you can review all the photos and decide which collection you like to purchase. (Here is a link to the different collections) Once you've selected and paid for your collection, your gallery will open for thirty days, preloaded with your print credit and set for you to download the number of files that corresponds with your collection.
Downloading your files:
Once you've decided which images you'd like to use for your download credit (no need to choose if you go with the Premium collection), I'd encourage you to do that immediately. The process is simple: select the images and use the down arrow in the upper right corner of your gallery - click on that and the system will walk you through the download process. The images will download as a zip file, which you can double-click on to expand. I suggest you make a second copy of the expanded files, then save the two copies to two different locations - I generally recommend that one copy be saved to an easily accessible drive (either on your computer or on an external hard drive), and that the other get saved to the cloud (Dropbox, Google Drive, etc.).
Copyrights (and wrongs):
Once you've got your digital files in hand, you are free to print them when, where, and as often as you wish - you can use them to make holiday cards, share on your social media pages or personal blog, etc. The only things you can't do are related to the resale of your photos or use for commercial/business purposes. For instance, if you authored a book, you'd need additional permission to use one of the photos on the dust jacket, and you wouldn't be able to enter one of the photos into a contest and win prize money for it. Otherwise, you've got free reign.
Printing your images:
While everything that I offer in my store is printed in professional labs and guaranteed to be beautiful, I also recognize that you may want to print your images yourself, and thanks to those digital files, you absolutely can! I recommend London Drugs for local printing . Be sure to de-select any colour correction options, and be sure to upload the original files you downloaded, not copies. The files you receive from me should allow you to print up to 20x30" at minimum.
Lastly, please arrive on time or be ready to start on time. Remember, your session is scheduled according to light. It is important that we start on time. Please plan for traffic or parking constraints. It’s best to arrive early.
I can’t wait to capture your family! Do not hesitate to ask me any questions you have. See you soon!